When you select export in JPEG format, the system will open a screen with options for exporting in this format:

In this export format, the video frames will be exported independently, each in a .JPG file.
•Quality: Select the JPEG compression quality.
•Resize video: Select this option if you want to resize the images, to decrease their resolution.
oWidth: Enter the new width of the images.
oHeight: Enter the new height of the images.
oGuide: Instead of providing a resolution manually, you can choose from some pre-registered options.
oKeep aspect ratio: Select this option to keep the aspect ratio of the original video when applying the new resolution.
•Limit the frequency of exported images: The option to limit the frequency of exported images is widely used to create "timelapse" type videos where you have one frame per hour, or even one frame per day for very long construction videos, where the same location is recorded for months and then you need to view the video with only a few frames per week, etc.
oFrame Rate: Select the frame rate.
oMetric: Select the frame rate metric.
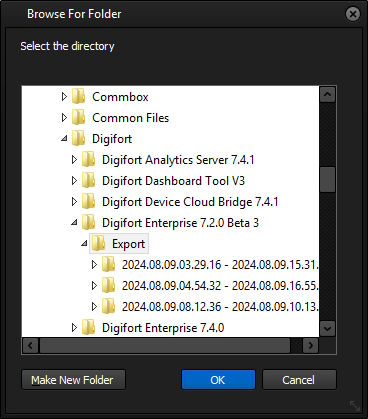
Click OK. The system will then display the export folder selection window:

The default folder selected will be the folder configured in the Surveillance Client's General Settings. On this screen you can choose the folder you want or create a new one.
Once you have selected the folder, click OK. The system will automatically create a subfolder with the start and end dates of the export, and all the material will be saved in this subfolder.
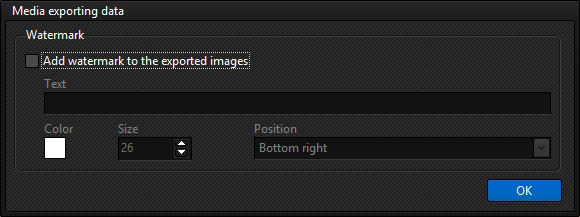
Once the export folder has been selected, the system will display a new screen with options for adding a watermark to the exported images:

•Watermark: Adds a watermark to the exported images. The watermark will be a text that will be superimposed over the image, using the properties defined below.
oText: Provide the text for the watermark.
oColor: Provide the font color for the text.
oSize: Select the font size.
oPosition: Select the position on the image where the watermark text will be displayed.
Click OK and the export will begin.